
The Top Hibiscus Videos on YouTube
For anyone keen on research in the information age, YouTube is an invaluable resource. The sheer amount of information that you can find is unfathomable. YouTube is incredibly well organized and has a lot of features that make it easy for you to find relevant content and have it show up in your feed. There are plenty of Hibiscus videos, too.
This article is going to focus on the absolute best YouTube Hibiscus videos to use for top-notch information on hibiscus. As a bonus, I’ll also take you through the reasons why YouTube is such an amazing resource for research. I’ll break the content up into different sections so that all the YouTube videos aren’t just slapped into the body of this article but rather highlighted for their particular strengths. The entries on our lists won’t be in any particular order.
This isn’t really a ranking of the top five videos for each segment but rather a collection of the five best examples of videos that really stand out as informative and entertaining ways to learn about the various aspects of hibiscus.
5 Hibiscus Videos about Seeds
Before we can plant, fertilize, or turn hibiscus into a bonsai, we need to prepare the seeds. A lot of people will buy hibiscus plants from the nursery. This is perfectly acceptable. In my experience, once you have flowers from the first plant you bought, you’ll want to try your hand at growing your own seeds. It’s a sort of natural progression.
This is where your love for beautiful gardens filled with stunning flowers usually steamrolls into a full-blown hobby or even passion. To that end, I wanted to cover a few Hibiscus videos I’ve found that aid our articles in visually portraying what our guides and tutorials say.
1: How to Make Hybrid Hibiscus Seeds at Home
This is an incredibly interesting Hibiscus video focussing on the part of the hibiscus journey that isn’t very well documented; pollinating your own hibiscus seeds. As a gardener or gardening enthusiast, there are ample opportunities for you to take matters into your own hands and get a little proactive and creative with your garden.
Pollinating your hibiscus flowers yourself can be incredibly rewarding. You can be a part of the growth of a new generation of hibiscus flowers from the very first step, and you can get a little adventurous and mix and match as you pollinate. Cross-pollination is when you fertilize the stigma of one hibiscus variety with the pollen grains of another.
This is best done early in the morning when the flower is primed for pollination. All you need to do is take an earbud and gently rub it against the anthers of one hibiscus variety. The anthers look like little hairy bits sticking out of the main central pillar, and this is where you’ll see the pollen grains. Next, you move to a different variety, and you carefully deposit the pollen grains onto the flower’s stigma. This is the tallest piece of the central column and is where fertilization takes place.
Daizz recommends you then gently close the petals of the freshly fertilized flower around the stigma and secure the closure with a thread. The pollen grains will gradually be taken down through the central internal structure of the flower and result in fertilized seeds. Wait for the flower to fall from the plant naturally, as this is when you’ll know the seed pods are almost ready. From here, we move on to the next Hibiscus video, detailing the steps that follow a seed that is fertilized and ready for harvest.
2: Preparing Hibiscus Seeds for Germination
This video is a tutorial by Hardy’s Hibiscus Heaven. Immediately this Hibiscus video shows you a neat trick to make sure you harvest as many hibiscus seeds from your plants as you can. All you need to do is place a breathable fabric bag, preferably organza, around your seed pods when you’re expecting them to drop their dark pearls of life-giving hibiscus goodness.
You’ll want to wait for the seed pods to open before you harvest, but you won’t want to sit outside next to your hibiscus waiting for this to happen. Therefore you use the bag to catch any seeds that fall while you’re waiting for all the seed pods to open. You don’t need to tie the bag tightly around the seed pod, just fit it over and wait for the seeds to fall.
Hibiscus seeds aren’t the smallest seeds around, but they’re not large by any means. These seeds are only a few millimeters in diameter, so working with them is fairly careful work. Preparing Hibiscus seeds for optimal growth is a hands-on task. You could just pop these babies into the soil and call it a day, but you might not have the same success rate you would if you make the necessary preparations for the seed to thrive.
When you look at the seeds, you’ll see that they have a slightly odd shape. No two will be exactly the same shape, but they all have two key features; a rounded side and a slightly pointy side. This pointy side is the bit that you’ll want to leave alone. This contains matter crucial to the seed’s growth. The rounded side is where we’ll focus our attention.
You need to now take a sharp knife and make an incision less than a millimeter away from the end of the rounded end. Essentially what you are doing is slicing off the very end portion of the rounded side, just breaking through to the soft white inside part of the seed. This helps the seed germinate faster and yields a higher success rate, with more plants making it through the germination and sapling phase.
Next, you need to place these seeds into a cup of room temperature water overnight. Once you’ve soaked them, your seeds are prepared and ready to be moved into a sprouting container.
3: Planting Hardy Hibiscus from Seed Indoors
This video was posted to YouTube by Diane Mumm Garden Videos. In this Hibiscus video, Diane covers planting perennial hibiscus indoors directly from seeds. I chose this video specifically because of her success rate. The batch that Diane planted in this video weren’t very good seeds. Unfortunately, very few of them sprouted. This is going to happen at some point. Gardening is a patient art, much like bonsai. Every now and then, you’re bound to have a few bad seeds that just don’t grow. It’s best to never go into a hobby or lifestyle like this expecting to have what people call a green thumb.
A green thumb is a bit of a myth for most people because the success you experience while planting or growing anything is based on so many different factors. You need to take into account that different plants have different requirements, and you need to make sure that your environment meets those well.
Sometimes, the reason why your plants won’t grow has nothing to do with anything you’re doing wrong. Your seeds could quite simply be infertile.
If you experience a bad batch, don’t quit. Try to the best of your ability to figure out what went wrong and take steps to prevent it from happening again or at least decrease its chance of occurring in the future. In Diane’s case, the problem was infertile seeds. There isn’t a known way to change this, but as Diane shows, there is a way to check whether your seeds are fertile or not.
You’ll first want to soak the seeds overnight. Diane mentions a refrigeration process to improve germination, but the most basic first step is to soak the seeds overnight. The following morning, you’ll want to prepare the seeds for germination. Take a few sheets of paper towel and lay them down in a plastic container with a lid. Place your seeds on the side of the paper towels and spray them with a little water. You don’t want the towel soaked or the seeds to be swimming.
The paper towels should be damp but not running with water if you tip the container.
Fold the other side of the paper towels over the seeds so that you have them in a paper towel sandwich. Don’t make your layers too thick; usually, two or three thin sheets are sufficient. Close the container and place it somewhere warm. I’ve found that a sunny spot on the kitchen table works wonders for germination.
After a few days, you should start seeing tiny green tails on the seeds. This means they are fertile and should grow. If your seeds look like they’re covered in a fuzzy residue or seem to be seeping into the paper towels, they’re not going to grow.
Diane’s Hibiscus video is the perfect example of how to handle horticultural defeat like a born gardener. This isn’t always the easiest lifestyle, no matter how glamorous and successful people on social media make it look. You’re probably going to stumble a little in the beginning, and you’re probably going to have a bad batch of seeds every once in a while. But keep your eye on the rewards that you can reap from having a functional and beautiful garden, especially one filled with the beautiful hibiscus.
4: How to Collect and Sow Hibiscus Seeds at the Start of Winter
This is a Hibiscus video by the YouTube channel Stinky Ditch Nursery. The man presenting the video doesn’t introduce himself, so we don’t know his name, but his video concerns planting hibiscus seeds in the cold winters of somewhere in the UK. He starts off by mentioning cuttings as another method for propagating hibiscus but also mentions that your success rate from cuttings in the winter won’t necessarily be high.
As we covered in our numerous growing guides, the best time to take cuttings from plants like hibiscus is during their active growing phase. In the case of hibiscus, this is spring to summer. We’ll discuss cuttings a little more comprehensively later in the article. For now, we are going to focus on planting hibiscus seeds in the winter.
The excitable Brit mentions a homemade seed mix that he uses for his seeds consisting of course sand, topsoil, and a recycled grow bag that looks somewhat like compost. You could very well buy a decent seedling mix from your local hardware store or nursery, but if you cannot do that, you could use equal parts of topsoil, coarse sand, and compost.
He goes further to run the three soil-like substances through a rough sieve and mixes them together. The next step is to prepare your growing container. The excitable Brit opts for a vegetable punnet of sorts. In my experience, I’ve found this works quite well too. Another brilliant option is if you have a plant tray lying around somewhere from a previous trip to the nursery. Never throw these away; they’re far too useful. Fill up your container to about half an inch from the top.
The excitable Brit recommends watering the soil before you plant, just to give your seeds a more substantial and stabilized growth medium. He then twists a few dry seed pods between his fingers to release the seeds. You could wait for the seeds to fall out themselves, but once the pod has started to split open, you can retrieve the seeds yourself; By this time, they’re fully developed.
He doesn’t make any preparations for the seeds like scoring, slicing, or cutting them. This is a personal preference. As you plant more and more hibiscus, you’ll figure out what method works for you. Personally, I prefer the scoring method because I’ve had more successful and faster growth with it, but that just means it’s a method that works the best for my needs.
Something he says that I feel is quite overlooked is how to arrange the seeds when you’re planting them in your growing container. Most of us just push the seeds into the soil, trying to maintain enough distance between them to facilitate better growth, but he plants them in defined rows. He does this because he says it’s inevitable that you’re going to get a small weed or two popping up with your seeds, and planting them in defined rows at least makes it easier to see which are seeds and which are weeds.
Another thing I noticed is that he doesn’t make holes in the growth medium to put the seeds into. Instead, he lays the seeds on top of the growth medium and covers them with more growth medium. The new layer should be twice as thick as the seeds themselves. This is considered light layering.
You might be a little confused as to why he chooses to plant hibiscus in the winter. The short answer is that he didn’t choose; nature did. At the end of the Hibiscus video, he mentions that he likes to plant in the winter because this is when nature is doing the same thing. This is the time of year when hibiscus seed pods are falling from their stems and naturally releasing seeds into the world. Sure, the seeds might stay in a sort of hibernation period until the ground is able to support seeding and growth, but the winter is when hibiscus seems to naturally want to grow in number and spread its seeds.
5: Grow Hibiscus from Seed
This isn’t a tutorial Hibiscus video and probably shouldn’t really be on the seed-related list of helpful resources. But I found a few interesting pieces of information that do relate to seeding. This is a video by Kissed by the Sun and basically gives you a very brief overview of the presenter’s experience growing hibiscus from seeds.
The Hibiscus video starts off listing the benefits of growing hibiscus, which are far more numerous than the items the presenter mentions. One thing I like that she mentioned is the challenge of growing hibiscus. It is a challenging plant, as most flowering species are. There’s a careful balance between all the nutrients, stimuli and elemental exposure you need to provide these plants with that makes growing them a rather involved affair. But the satisfaction you’ll feel after your first hibiscus plant produces its first beautiful flowers is enough to make you want to do it all again.
Hibiscus also has a lot of health benefits, but the presenter terms them as ‘alleged’ benefits. As you’ll see in a future article, there is not much that is alleged about the health benefits of hibiscus. The plant is rich in vital vitamins and minerals and contains elements that cause chemical and physiological reactions with the makeup of our bodies to produce positive changes. These effects have been documented, proposed, investigated, and studied thoroughly by medical students and scientific researchers the world over. The basics of the health benefits of hibiscus are unless you already have an excessive amount of any of the vitamins this wonder plant contains, ingestion of hibiscus in moderated amounts can be incredibly beneficial to your general health and well-being.
The full extent to which this Hibiscus video actually covers the experience of growing hibiscus from seed is as follows:
- The presenter planted her seeds on 3/26/2018
- It took around three weeks for her seeds to germinate fully
- She planted four seeds, of which only one survived.
The most interesting part of the Hibiscus video is around 1:25 when the presenter mentions special instructions she received with the seeds. She says that she was instructed to scarify the seeds by rubbing them against 150-grit sandpaper. The instructions went on to say that hibiscus seeds are incredibly tough. I’ve never heard of rubbing seeds against sandpaper to prepare them for germination, but the principle is one that definitely could work.
When you slice or score a hibiscus seed, your primary goal is to gently expose the soft white central structure so that the seeds root sooner, produce their cotyledons (very first leaves) soon, and grow slightly faster. By applying sufficient friction to the seeds using sandpaper, you’re essentially doing the same thing; getting rid of the hard outer shell to make it easier for the plant to grow faster. As long as you don’t shave off the pointed end where the cotyledons grow from, you should have relatively high success with this method.
The rest of the video is interesting information about hibiscus, much of which I’ve already covered in previous articles.
5 Hibiscus Videos for Planting Trees
As with any plant, hibiscus can sometimes be a little tricky to plant. We here at The Bonsai Alchemist have an extensive collection of techniques and methods for planting various forms of greenery to yield the best results. It can be extremely beneficial for the more visual learners to supplement our comprehensive guides with a Hibiscus video or two. That way, you can learn from our guides and also see hibiscus planted so that you have all the tools at your disposal for the best possible results.
1: How to Plant hibiscus in the Fall
This is a video by the ehowgarden channel on Youtube, presented by plant expert Nicholas Staddon. In the video, Nicholas teaches you how to plant hardy hibiscus in the fall. For anyone new to horticulture or active gardening, a seasonal Hibiscus video like this might seem like a pointless detail. But as we’ve established in our many fertilizer guides, fall is not an active growing phase for many plants, and fertilizing plants like hibiscus normally during the fall can result in significant damage to the plant.
Right off the bat, this video is as helpful as our planting guides in that Nicholas shows you exactly how to go about planting your hibiscus. The hibiscus shrub he plants is already quite an impressive size, around a foot and a half tall, which means it will take to the new soil and begin its active growing phase a lot easier than a smaller sapling or a freshly rooted shoot.
As Nicholas says in the Hibiscus video, it’s important that the hole you plant your hibiscus in is big enough to support its eventual growth. He goes on to recommend a hole at least twice the size of the pot you buy your hibiscus shrub in.
One thing in the video that you’ll notice in all our planting guides is the importance of mixing the native soil with the plant’s soil from the pot you bought it in. Native soil is the soil that you want to plant the shrub in when you’re moving it to your garden. Some people recommend you shake the roots clean of the pot’s soil and then put the plant into the hole you’ve dug for it. I wouldn’t recommend this in any case, but this is particularly risky during fall as it’s quite a culture shock of sorts for the new hibiscus plant. You want your plant to keep sustaining itself comfortably, and to that end, it’s always best to mix the native soil and that from the pot.
Sometimes plants we buy from garden centers or nurseries are rootbound. This happens when the pot they’re initially planted in is too small to support the plant’s growth, and its roots end up taking the space of vast amounts of soil. Therefore it’s always a good idea to loosen the roots a little and remove some soil from them. This soil you’ll then want to put directly into the hole before the plant. If there is excess soil in the pot once you’ve carefully taken the plant out, you’ll want to tip that into the hole as well. Reach into the hole with your hands and roughly mix some of the native soil with the potting soil. This is so that the plant recognizes its growing medium and adjusts faster to your garden’s soil. We have done a few segments on the importance of soil that might be worthwhile to read as well.
One that we don’t really agree on is the reason for not using fertilizer in the fall. In the video, Nicholas says that he doesn’t want to mix any slow-release fertilizer into the soil because he doesn’t want to encourage the plant to grow too much during fall. In our experience and from our extensive research, we have noticed that fertilizer during dormant phases actually causes significant harm to the plant. So to keep your hibiscus safe and flowering beautifully in the growing seasons, don’t fertilize in the fall. Another thing to note is that a lot of the potting soils you’ll buy plants in at the nursery already have small amounts of slow-release fertilizer in. This will generally aid the roots in their development in your garden, so applying any more would be excessive.
We’d recommend watching Nicholas’s Hibiscus video on the ehowgarden channel to get a good feel for how to plant hibiscus in the fall. Seeing the entire process in practice is the perfect way to supplement our articles and get your green fingers flourishing.
2: How to Plant Hibiscus Plants
This is a much shorter video than the previous one, but it gives a slightly different perspective on how to plant hibiscus. This video by Tom Leeman is not a seasonal guide, so you could use this as a guide during any planting season.
The most interesting takeaway from this Hibiscus video is that Tom recommends cutting around 2″ off the bottom of the roots once you’ve taken the hibiscus out of its pot. As we saw in the previous video, the roots come out of the pot rather cleanly as almost a root cake, so it’s easy to take a saw or a sharp knife and just slice two inches off the base. Tom recommends doing this so that the roots open up.
The other way to open the roots up a little to allow airflow and get them out of that compacted state is to roll them in your hands a little. This will break the ‘cake’ up, and your roots will be able to thrive.
Much more can’t be said about this Hibiscus video, but I thought it was innovative to slice two inches off the bottom of the roots. We typically also use this root-pruning system when repotting bonsais and to prevent plants from becoming root-bound.
3: Gardening Tips: How to Plant Hibiscus Seeds
This is a slightly more useful video of you’re working with hibiscus seeds as opposed to an already rooted and growing plant. This is another Hibiscus video on the ehowgarden channel, this one presented by third-generation flower grower Yolanda Vanveen. At the start of the video, Yolanda gives you a handy list of things you’ll need for this particular planting. These include your hibiscus seeds, a plastic bag, a napkin, a container, and soil.
An interesting thing about this Hibiscus video is that it covers seed germination as well, which is something we have extensive information on in our other articles. This makes this video more comprehensive than other shorter seed planting videos.
Yolanda’s guide is definitely one of the simplest around, requiring you to only push the seeds into the soil in your pot and water them. This is very different from some of our guides which would yield better results overall. Another thing Yolanda says is to place your pot into direct sun. This isn’t the best idea depending on how warm your city is. You don’t want to expose young hibiscus plants to too much direct sunlight too early on because they aren’t equipped to deal with it. Essentially, your plants will burn before they’re allowed to grow.
The best method we’ve experienced for growing hibiscus seeds is to use a makeshift greenhouse made from a clear plastic bag and a medium pot. As highlighted in our guides, all you need to do is plant your hibiscus seeds, water them moderately, place the bag over the pot and let it grow in its own little environment for a few weeks. This is a near foolproof way to propagate hibiscus or grow hibiscus from seeds. Your young plants or seedlings will need a controlled environment in which to root properly and get strong enough to take on the outside world.
Slowly, you’ll introduce the plant to the outside air and unfiltered sunlight by removing the bag after a few weeks. And eventually, you’ll be good to plant your new sapling into your garden.
4: Planting Hardy Hibiscus
This next Hibiscus video is a much more comprehensive growing guide than those before it. It is, therefore, more like the content we write than the rest. We try as far as possible to give you as much information as possible in each of our articles, and this video presented by Mary Jane from Home for the Harvest does just that.
The first thing that Mary Jane does is introduce you to hibiscus in a really descriptive way. Much like our articles, she explains what they look like, but because she’s using a much more visual form of communication, you can see what our descriptions actually mean. Mary Jane describes the leaves of the hibiscus as looking similar to a maple leaf. For a more in-depth description and explanation of what hibiscus looks like, why not check out our piece on the topic?
Mary Jane also specifies that the variety she is planting in the Hibiscus video is a perennial herbaceous variety meaning it will flourish all year round. I really love the way Mary Jane talks about hibiscus because it’s very similar to how I feel about these beautiful flowering plants. I love being introduced to people who are clearly and proudly passionate about flowers and plants the way I am, and that is definitely something that comes through in Mary Jane’s videos.
The video deals with the basics of planting hibiscus, first and foremost of which is that it loves sunlight. This is only for hibiscus plants that have passed their germination phase and are now small shrubs of around 2 feet. By this time, the plant has a strong foundation of roots to support it, and its foliage and flowers can handle full exposure to direct sunlight. Hibiscus does well anywhere it can receive at least six hours of direct sun every day, so find a nice sunny patch in your garden to plant these beauties.
5: PETITTI Hardy Hibiscus
This video presented by Noelle Akin is a brilliant resource if you’re looking to plant perennial hibiscus in your garden. Noelle starts off explaining the basic differences between tropical and perennial hibiscus, something we’ve covered in a previous article, and she gives an overview of the flower itself. She also provides ample information on the conditions this hibiscus needs to thrive, as we do comprehensively in our articles.
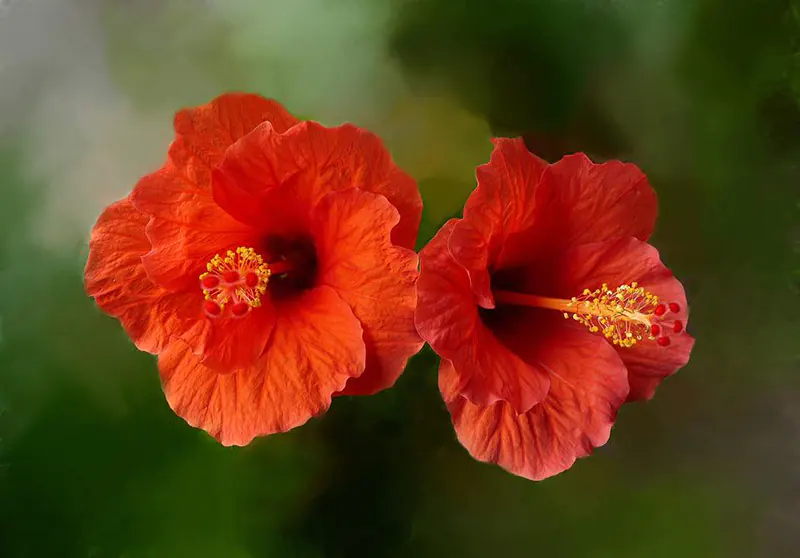
This is also a really good Hibiscus video to explore if you’re looking for fun facts about hibiscus. One of which is that the darker and redder the central eye of the flower is, the more attractive it is to pollinators like hummingbirds and bees. Over the past few years, I’ve had a small dream that I’ve been pursuing which is to make my garden as welcoming to bees as possible. I also try and encourage friends and family to do the same due to the looming danger that these beautiful little golden pollinators will become extinct. One of the things that attracts me so much to hibiscus is the fact that it’s a draw for pollinators. These can be planted away from your house in a sunny spot against your fence if you’re a little scared of the bees coming too close.
This video isn’t a planting guide. Noelle isn’t going to show you how to plant hibiscus, but she will tell you all the reasons you should be planting hibiscus in your garden. These include deer and bunny resistance if that’s something you struggle with. In the spirit of a well-rounded collection of information, I didn’t want to just give you five videos showing you the ‘how’; I also wanted to include some info on the ‘why.’ There is a lot to be gained from planting any kind of hibiscus in your space, the most striking of which is their absolute majestic beauty.
5 Hibiscus Videos for Propagation
Propagation is a particularly fascinating topic within horticultural spheres. Essentially, it means taking pieces of plant matter from one plant with the intention of creating a new plant. As you’ll see from our list of Hibiscus videos, there are many different ways to achieve propagation, and some are far easier than others. You might also encounter one or two methods on our list that you had no idea were even possible.
1: How to Propagate Hibiscus from Cuttings in Water
When I was first starting out on the path to horticultural mastery, a path I’m still very much working toward, I remember combing research papers and articles for water propagation methods. This was before I started writing the articles myself. Propagating plants in water holds such raw appeal in the minds of young gardening enthusiasts because it’s simple, affordable, and doesn’t require loads of external resources.
This Hibiscus video by Urban Gardening is the epitome of what I was hoping to find back then, as it explains in detail that you don’t need all sorts of elixirs and serums to promote healthy root growth. Although this is The Bonsai Alchemist, so elixirs and serums would fit in quite nicely here.
The first thing of note the creator of this Hibiscus video mentions is that you need to take cuttings that are not yet fully mature. This is cardinally important because a mature cutting has already exhausted its primal growth resources and is now focused on branching out and bearing bigger leaves that enable photosynthesis. You want cuttings that still have that primal growth directive within their cells and will simply do that growing in a container of water as opposed to attached to a parent plant.
He also mentions that you should use semi-hardwood cuttings. While this is preferable, hibiscus shares a few attributes with bougainvillea in that if you take cutting in the right season, you can take cuttings from virtually anywhere. The best time to harvest cuttings is at the beginning of the growing season, usually spring, because the cuttings will be predisposed to grow. You could still realistically have success in the winter, but because the growing functions of the plant are dormant, it’ll be more difficult. In winter, plants like hibiscus are more concerned with maintaining themselves than spreading out and multiplying.
Your cuttings should be between four to six inches long to promote proper growth, and before you do any kind of propagation, you need to remove as many leaves as possible. Leaves use the same resources as roots, so if your cuttings have to preserve a thick bush of leaves, there are fewer nutrients available to send into root production, and without functioning roots, your plant will not survive.
The next step is identifying the lower-most node on your cuttings and making a 45-degree cut just below that. This also helps with root production. At the end of this step, you basically need to have what looks like a selection of twigs devoid of leaves, with 45-degree angles at their base.
Next, you need to ‘wound’ the cuttings. Basically, by scraping off the lower 1-2 inches of hard outer material, you increase the surface area available for root production. You’ll do this with either a pocket knife or a carpet knife. Kitchen knives work, too; I just find that smaller knives are easier to handle when working with plants, you’ll also likely get a closer shave.
Once your cuttings are properly prepared, you can place them all in a glass of water around 1-2 inches deep. You don’t want too much water in the glass as this can cause rot. All you want is for the bottom of each cutting that you’ve scraped and cut to be submerged. The presenter mentions using rooting hormone and potting mix in the water, but since this is being aimed at those who don’t have that kind of thing readily available, I’ll point out that these are not necessary. I have had plenty of success using just water.
The glass should be kept in partial shade for around five days. You should start seeing root development after around 3 days, but this timing can depend on the season you’re doing this, the temperature, and other factors like humidity. Your cuttings will also start developing new leaves as they grow roots; feel free to remove these if you intend to leave them in water for a little longer to get stronger roots. The general rule of thumb is that when you have roots of around 3 inches, it’s safe to rehome your cuttings into individual pots.
2: Grow Hibiscus from Leaf
This is a really fascinating idea, one that I’ll admit I wasn’t familiar with until doing research for this article. The premise is that you can grow hibiscus by getting the leaves to root. Wild, right?
The Hibiscus video was posted by Dian Garden tips and is the only one of its kind that I’ve found so far. Given that leaves and roots are usually treated as mutually exclusive parts of the plant, in that you remove leaves if you want more roots, I was very skeptical when I first came across this video. But after doing more research and with my relatively thorough understanding of how plants work, I feel confident that this method has a lot of merits. I have started an experiment of my own to test this method, but the science behind it holds up.
To start off, the creator of the video prepares the leaves. This involves removing a few of them from a hibiscus branch as you would with other propagation methods. The defining difference here is that you keep the leaves instead of relegating them to a compost heap. This is particularly important as it provides you with another use for the hibiscus leaves you remove from branches you want to propagate.
You then prepare a container of water. It looks like she uses a fairly standard-sized bowl, and the method is definitely scalable to a growing tray or a breakfast bowl if that’s what you have on hand. I have tons of growing trays in my shed, so that’s what I’ve opted for. The next step is to fill the container with sand. The sand used in the Hibiscus video looks a lot lighter than what I have readily available, but the sand is used as a growing medium and not necessarily a source of nutrients, so you’d be fine using any sand you can find in your garden.
The creator then soaks the sand in water. The bottom of the container looks to have holes in for drainage, so growing trays would be your best bet. Once the sand is quenched and the consistency of a good mud, it’s time to place your leaves stalk-first into the container. The roots will grow from the nodes of the leaves, as they do with other cuttings, so as long as the nodes are still intact, your leaves shoot root easily.
No mention is made of where to put your container while you wait for roots to form, but given that this is essentially now a young plant, the best place would be in partial shade. You don’t want to put the container into direct sunlight because the water will evaporate, the leaves will wilt, and you won’t have the conditions necessary for roots to develop. After 25 days, you should have sufficient rooting to transplant your new plant to a bigger pot. After 30 days, you should see multiple leaves growing, and this will mean your hibiscus is viable. From here, you should water the plant once a week and monitor its growth until it’s big enough to go into the garden.
3: How to Grow Hibiscus Plant
Despite the title, this is a Hibiscus video about hibiscus propagation with cuttings, not just growing the plant. This video was posted by Johnson Engleng and differs slightly from other cutting videos and processes we’ve covered in that he uses softwood cuttings. We’ve spoken about softwood cuttings in previous articles, but this video shows you what they actually look like. Softwood cuttings are basically the narrow part of the branch toward its tip.
Use a sharp implement to harvest your cuttings. You don’t want cuttings that are torn but rather feature clean cuts that make for easy propagation. Don’t make your cuttings too long; stick to around 5-6 inches. You’ll also want to clean your cuttings off a little; this requires removing excess leaves and smaller branches. You can leave the top-most leaves on the plant, but I prefer to remove as much as possible, leaving three or four leaves behind. This ensures that enough nutrients are diverted into root production and not that of the leaves.
Johnson uses aloe leaves as a rooting hormone. I haven’t tried this before writing this article, but it has a lot of merits as aloe does have properties that encourage growth and repair, which is essentially what rooting is. For those of you who haven’t delved much into the science behind propagation, here’s a short summary:
Propagation is not only achieved by placing a cutting into a growth medium and willing it to grow. The process relies on wounding the plant, at least at the base of the cutting, where you want roots to develop from. Plants are inherently predisposed to want to grow, and they will do this without fail to the best of their abilities and available resources. Plant propagation is similar to the process of building muscle. We introduce external stimuli to the body to essentially exert the muscle to the extent that it develops micro-injuries. These are then allowed and encouraged to heal, as the body does quite naturally in most cases. And the healing process requires building the muscle stronger so that it cannot be harmed by exertions of the same intensity in the future. Therefore, as you get stronger, your muscles require more work to increase in strength. The same happens with plants.
In some cases, growing is a response to external stimuli. In this case, you scoring the base of cutting activates the plant’s will to survive. It has been wounded, and it needs to build protection up against that kind of wound in the future. Roots make plants stronger, harder to pull up and increase the likelihood of them staying put once they are planted. So in order for a plant to be safe from that kind of wound in the future, it needs to build up stability in the form of roots, and it needs to get stronger.
Back to the Hibiscus video. The next step is to insert your cuttings into the rooting hormone. In this case, Johnson is using an aloe vera leaf. He slices off the side of the leaf, exposing enough of the side to insert the cuttings into. The cuttings are left inside the aloe vera for around two minutes to fully absorb all the plant’s goodness and rooting food. After two minutes, you’re good to take them out.
For the growing medium, Johnson uses a mixture of garden soil and compost. This is definitely easier for most people to get their hands on than high-grade specialized soils and seedling mixtures, so it has my vote. The next step is simple and straightforward: make a small but deep hole in the moist soil, stick your cuttings in about a third of the way, and water liberally. He also mentions to my delight that the cuttings should not go into direct sunlight. After 50 days, your cuttings should be beautiful little hibiscus plants. It’s unlikely that you’ll have flowers this early on, but you’ll have plenty of glossy leaves and maybe a bud or two.
4: Propagating Hibiscus from Cuttings (With Actual Results)
We’ve covered water propagation, leaf propagation, and softwood propagation so far. To make this as diverse and comprehensive an article as possible, we are now going to tackle hardwood cuttings with this Hibiscus video from Easy Peasy Gardening. Hardwood cuttings are not generally thought of as easy to propagate or root, but with the right process and knowledge, they can be. Hardwood cuttings are thought of as particularly difficult to work with because of their woody nature. Many plant lovers will tell you that when a shrub goes woody, it’s time to rip it out and plant a new one. This isn’t exactly true.
I have six lavender plants in my yard that have been woody for at least three years, and they still bear permanent purple blooms and misty green foliage. There are many ways to prevent a woody plant from looking dry and dead, and contrary to popular belief, woody stems and branches aren’t dead and dry. Woody parts of a plant are simply older and more mature than younger, more supple green shoots and branches, but they are still capable of growth and producing vibrant foliage and pretty blooms. I love Hibiscus videos like this that teach people how to handle woody parts of plants like hibiscus, so this video is particularly special to me.
As mentioned above, woody branches are characterized as those that have made the full transition to a brown, sometimes gray, dry appearance. The presenter starts off with a large cutting of around two feet in size that she then takes smaller cuttings of around 5-6 inches from the ‘parent’ cutting. You’ll notice a trend here of 5-6 inches in length for cuttings. This isn’t an industry standard or anything; it’s just a really manageable length. It’s not too long that the growing phase is laborious because there’s too much plant matter to support or too short that there isn’t enough plant matter to support healthy growth. It’s a propagation sweet spot.
The next step should be expected by now and hopefully becomes muscle memory as you read about this and do this more often. You need to remove any excess branches and leaves from the cuttings. The presenter cleans the cuttings completely; this is the way I do it. I find leaves and extra branches slow down the process and sometimes impact it so much that the cutting fails to root.
The presenter also chooses a mixture of thin and thick cuttings. This is advisable if it’s your first time doing this; you’ll be able to see what your preferred thickness is and where you have the most success. Cuttings, in most cases, are the perfect place to experiment.
The Hibiscus video jumps to where the cuttings are resting comfortably in a glass of water, and the presenter says that they’ve been that way for about two months. No special preparations have been made to the cuttings other than cleaning, and no special substances were used in the water. The cuttings were simply placed into the water and allowed to start growing and rooting. She does, however, mention that the water was changed every week.
When you look at her cuttings, you can see that they are growing leaves quite well, but their roots are almost invisible and look more like a fuzzy residue at their base. There’s an argument here that if the bases of the cuttings were shaved or split slightly, that growth would have been faster. But this is to show you that there is more than one way to propagate hibiscus. You don’t have to do everything these guides tell you, but explore different options and find what works for you.
5: Powerful Homemade Rooting Hormones
We have covered all of the basics of propagation with cuttings, so for this last video by Garden Tips, I thought I’d focus on something that isn’t propagation itself but is very much related and intertwined with the process; Rooting hormones.
Rooting hormones are easy enough to find and buy. But sometimes, it’s a lot easier to use products and resources you have readily available at home. The basics of a good rooting hormone are that it contains Indole butyric acid (IBA) and naphthalene acetic acid (NAA). These are both natural compounds that stimulate healthy root formation and are produced naturally by plants. Some cuttings will produce these compounds themselves as well, but it’s good to add a separate rooting hormone to your cuttings to ensure successful propagation. With the basics out of the way, let’s list a few of the best household products to use as a rooting hormone.
- Saliva – This is by far the most readily available of all. It’s not strictly a household product, more like a human by-product. But the fact stands that saliva is an incredible source of antibacterial and antifungal protection. By coating the exposed section of the cutting’s base in saliva, you’re slowing down any natural process of decay from setting in, preventing bacteria or fungi from taking hold, and promoting healthy root growth.
- Apple Cider Vinegar – This plant wonder drug in almost every kitchen cupboard in the country has over 30 trace elements of compounds beneficial to plants. You cannot go wrong by incorporating a little apple cider vinegar into your rooting process. ACV can be dangerous to plants in that it is used as a weed killer. But, fun fact, it won’t harm roots. The prescribed dosage is a teaspoon of ACV in around 5-6 cups of water. Don’t go over this amount; like most things, too much of this good thing is not a good thing.
- Cinnamon Powder – Most of us have either cinnamon powder or bits of bark in our kitchens. Apart from adding a really exotic and spicy taste to your favorite tea, cinnamon powder can be used as a rooting agent. It’s important to ensure that the cinnamon is finely powdered; Rubbing a piece of bark against your cutting will have no effect. Cinnamon is also a known antifungal and antibacterial, so you’ll be protecting your hibiscus cuttings against pests too.
- Honey – If you needed another reason to start a small bee farm at home, here is the perfect one. In addition to being a valuable source of vital pollinators to keep your hibiscus blooms flowering, the honey you’ll get from a beehive is excellent for use as a rooting agent. It’s advised you use pure honey as opposed to processed variants as it’s better for plants. Don’t dip your cuttings directly into the honey. This is likely to attract ants, as we discussed in the article about pests. Rather mix a teaspoon of honey into a cup of boiling water, and set it aside to cool. Once cool, place your cuttings into the honey solution and wait a few weeks for roots to start developing.
Final Word
There are a thousand ways to learn something new about topics you love. YouTube is definitely one of the most enjoyable platforms to learn on. While there are no doubt vast amounts of unverified and unmonitored content that should be taken with a grain of salt, if you know where to look, you’re bound to find a wealth of information shared by people who are passionate about their content. In that way, the good channels on YouTube are similar to The Bonsai Alchemist.
On our website, you not only have access to a near-endless source of critical information about the plants and trees you love but they’re also written by deeply passionate individuals who are sharing a piece of themselves with you through every article and post. You can rest assured that hours of research have been put into every piece to not only give you the best quality information we can but also to make it palatable to a larger audience and easier for more people to identify with.


