
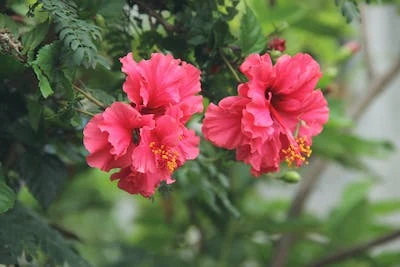
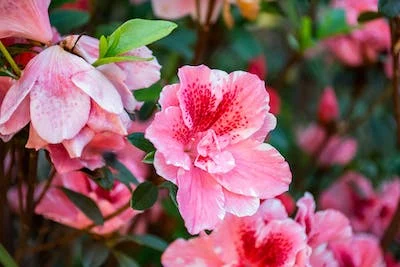
Hibiscus is one of the plant kingdom’s biggest flexes. This flowering genus has permeated almost every climate and living condition known to man to such an extent that different species of it thrive in the harshest situations. In fact, there’s only one climate where these babies won’t grow – sub-zero temperatures.
The world is entering new seasons right now. If you’re in the northern hemisphere, you’re likely heading into fall now. If you’re unfortunate to be located in the southern hemisphere, you’re experiencing the spring right now, but depending on how far south you are, it feels like summer on Venus. Even though we typically don’t suggest repotting hibiscus in the fall, it’s okay if you do. Especially if you’re headed into the coldest months of the year, and you don’t want your hibiscus in the garden where it’s susceptible to frost. In such cases, we’d suggest putting your hibiscus into a pot so you can move it with greater ease.
To that end, we’re about to head into our most comprehensive guide on repotting plants. This is the definitive guide to repotting hibiscus and hibiscus bonsais.
How to repot hibiscus in 9 easy steps
Here’s what you’ll need:
- A suitable container
- A growing medium of your choice (usually potting soil)
- A sharp knife or blade
- A pair of pruning shears
- An organic mulch or decorative alternative
Now that you know what you need, let’s get into the process we recommend you follow. As with all of our guides, it is up to you which processes and steps you deem the most important. If you’ve seen better success in your climate with an alternative method, that’s the one you should use.
Check our complete guide on Hibiscus bonsai tree care here!

Step 1: Is repotting necessary?
Author note: This step only applies to plants that are already in pots. If your hibiscus is planted in your garden, you won’t have to do this, and you can skip to step 2.
The first step should always be to determine whether you really need to repot your hibiscus or hibiscus bonsai. Now, if you’re doing this for environmental reasons or so that you can move the pot around to maximize on sunlight and warmth, do so freely; you’re completely justified. However, if you have no clear rationale and simply want to do it because it looks fun – and it is – then you should ask yourself if it’ll do your plant good or harm. Here’s how you determine that:
First, you’ll want to check the drainage holes of the current container. If you can see roots protruding from the holes, it’s time for a bigger container. Another good way to check is to loosen the hibiscus plant from the container and see if the contents of the container come up as one big mass. If this is so, it’s time for a roomier container. However, if there are no protruding roots and there is still considerable soil surrounding your plant’s roots, it can remain in its current pot.
Step 2: Choose your container
It can be a pain to choose a new bonsai container – specifically for display purposes. If you would like a little more clarity on that, we have a guide on choosing the right pot for your bonsai. However, choosing a pot for a potted plant is often far easier. In general, most of us use the classic terracotta-colored plastic pots. You can also get them in black, brown, and green, but terracotta is the most popular color. This isn’t always the final pot you use. In many cases, people plant into these pots, which then go into more decorative pots. But the size of this pot is what matters the most.
If you want to keep your hibiscus the same size as it currently is, choose a pot with the same diameter as the current pot. If your plant is not yet in a pot, it can be a little more difficult to choose the right size.
First, ask yourself what kind of plant you want in the end. Do you want a hibiscus shrub? Or do you want something a little bigger, similar to a dwarf tree? Or do you simply want a small bush of hibiscus flowers? For a small flower bush, we’d recommend a 10-14 inch pot. For a mid-sized hibiscus shrub, we’d opt for a 14-18 inch pot. If your intention is to wind up with a dwarf hibiscus tree, you may be looking for an 18-30 inch pot.
Ensure that your chosen pot has sufficient drainage holes in the bottom; hibiscus does not like wet feet. You’ll also want to ensure that the pot you choose is around as tall as it is wide. Hibiscus does not do well in shallow pots.
Step 3: Prepare the soil
Once you’ve selected the perfect pot, it’s time to prepare your soil. All plants, specifically flowering plants, have different soil and nutrient requirements. We’ll go into detail about the nutrient requirements for hibiscus below this how-to, but feel free to scroll and refer to it now if you aren’t sure what soil you want to use in your pot.
Whichever soil you settle on, whether it be straight-up soil or a soilless growing medium, you’ll want to put around two inches of it in the bottom of your pot. Next, you’ll want to wet the soil a little. As stated above, we’ll go into detail about hibiscus soil in a minute, but all you need to do right now is put soil into your pot. Whatever soil you choose, make sure that it drains well.
Step 4: Dig up your hibiscus
If your hibiscus is already in a pot, you’ll have already loosened it out of its pot in step 1. If it is currently in the ground, you’ll need to dig it out. I always water the soil around the hibiscus before I dig it up; this just makes the process easier. You’ll want to dig a chunk of soil that roughly matches the size of the pot you intend to put it into. This will ensure that you don’t rip too much of the root mass from the plant.
Next, you want to take what we call the root ball of your hibiscus plant and loosen it with your hands. Basically, the motion here is gently grabbing the root ball with both hands and squishing the rooted soil. This will break up the mass slightly and give you a better idea of the roots you’re working with. If the soil is really tight, you can also use a skewer stick to try and break the root ball up a little.
Step 5: Prune your roots
Okay, I know we took the plant out of the ground really carefully so that we didn’t damage the root system. However, you also want to make sure that only healthy roots go into the new container. Give the roots a once over with common sense and see if there are any really wet, limp appendages. If your roots are wet and smell rather foul, you’ve got root rot. We’ll leave a short guide on how to deal with root rot effectively below this guide.
If all of your roots are healthy and strong, you’ll just want to cut away enough such that the size of the root mass is similar to that of the container. If you want your plant to grow a little bigger in its new home, take a little more of the root mass off. Typically, you’ll see a mass of fine roots and one individual root a little thicker than the rest. Don’t touch the thicker root. This is your plant’s primary means of taking in nutrients from the soil. I’d say that the most of the root mass you’ll want to take off is around a third of the length of all the roots – save for the thick structure. Taking off any more than this could put your plant in danger.
If you want your plant to stay roughly the same size, don’t prune the roots as much. Try to only prune those that are broken.
Step 6: Plant your hibiscus
Now we get to the actual planting. Take your hibiscus and place it into the new pot. One thing to keep in mind is that the top of the root ball should only be around 2-4 inches below the pot’s rim. If you need to raise the root ball, simply place more soil into the bottom of the pot. Inversely, if you need to lower the level of the root ball, simply remove a little soil from the pot. Once your hibiscus, and its root ball are where you need them to be, fill the pot with your growing medium of choice. That’s all there is to it.
Step 7: Settle the soil
Depending on the size of your pot, you’ll want to gently tap the pot on a flat surface a few times to settle the soil. If you’re into baking, this is a similar motion to tapping the bottom of a cake tin so that the batter settles and produces an even surface. In this case, this is to make sure that your soil doesn’t flow over the sides of the pot when you water your hibiscus.
Step 8: Water your hibiscus
The second to last step is watering your hibiscus. If you consult our hibiscus species guide, you’ll see more intricate information on how much water your hibiscus needs. However, to make this article less of a novel than I usually write, we suggest watering your hibiscus thoroughly once potted. There’s a little bit of a trick to this though. When we say water thoroughly, we don’t mean shove the pot under a tap and run the tap full blast. What we mean is that you should water your plant slowly.
Letting the water flow in just a little more than a trickle will ensure that the water gets to all the nooks and crannies between the roots. When the water runs out of the drainage holes, you’ve got proof that the water has gone all the way through the pot and you’ll be able to stop watering. From there, you’ll want to water your hibiscus once a week, or when the soil feels dry. In some climates, hibiscus can go up to two weeks without needing much fuss, so be mindful of the heat and humidity levels. Cold weather means less frequent waterings, warm weather typically means you should water more frequently.
Step 9: Let there be light
This last step has to do with your hibiscus’ light requirements. Typically, hibiscus grows best in tropical conditions. These are climates with a lot of sunlight and a good amount of warmth. Therefore, you should try to give your hibiscus access to as much sunlight as possible.
That said, when you’ve just finished potting your hibiscus, it’s best to leave it in a relatively cool spot for a while so that it can get accustomed to its new space. Leave it in indirect light for about two days, and then you can move it to where it can soak up all those beautiful photons it uses for photosynthesis.
That brings us to the end of the actual potting guide for hibiscus and hibiscus bonsais. From here on out, we’ll be getting a little more familiar with the specifics, such as the right soil to use for hibiscus and how to deal with root rot the right way.
Hibiscus’ favorite soil
We all have our favorites in this regard. Whether you see soil as food, we have preferences for food as well. If you see soil as your plant’s bed, some humans can get pretty vocal about their sleep number and requirements for a good night’s rest. I can hear some of you muttering about 1000 thread-count Egyptian cotton sheets wistfully.
Even if you think of soil as nothing more than an environment within which your hibiscus plant exists, you likely have preferences there too. For instance, I’d rather be literally anywhere else right now than in the middle of the heatwave that is currently blistering and burning my city. We all have our preferences, and hibiscus is no exception.
We’re going to tackle hibiscus’ preferred soil according to three criteria; texture, soil pH, and fertility.
Texture and drainage
As we discussed above, hibiscus does not like wet feet. This means that they thrive in well-draining soils. As soon as your hibiscus’ soil becomes waterlogged, your plant may develop root rot and stop thriving. You’ll also notice this as increased moisture retention in the leaves, and they may droop, go yellow and fall off.
With the majority of hibiscus species, you’re looking for soil that is moist but does not hold excessive amounts of water. These would be your loam and sandy loam soil varieties. You should, however, keep away from soils that are a little too sandy, as this will likely not have the kind of moistness that hibiscus roots need.
If you end up with sandier soil, you can always increase your soil’s moisture by adding organic matter like mulch. Mulch is a wonderful cure-all solution for dry sandy soils. Inversely, you can use sand to improve the quality of clay-rich soils. I live near a river – one suburban block away from it – therefore, my soil is incredibly rich in clay. Clay is essentially the definition of waterlogged soil, so much so that you can physically mol a clump of it into anything. I made a dinosaur once, but that’s neither here nor there.
If you have clay instead of soil, you can circumvent the soil repair process by simply planting in raised beds or, as is the motivation of this article, a pot! This will give you the best control over the soil that you shove your hibiscus plants into.
Soil pH
Soil pH sounds like something only a handful of the most learned and dedicated botanists care about, but it’s actually really easy to explain, and it plays a massive part in whether your plant thrives or suffers.
Basically, you have a scale called the pH scale. This refers to whether a substance is more acidic or alkaline. The mid-point of this scale is 7.0. At a pH scale of 7.0, a substance is considered neutral, neither alkaline nor acidic. Don’t ask why the scientists, in their infinite wisdom, chose 7; it’s a complex answer. But, if you want the answer, we’ll provide it at the end of this article.
If your soil’s pH is above 7.0, it is more alkaline, and if the pH rests below 7.0, you have acidic soil. Many plants enjoy growing in alkaline soil, such as Lilac, Lily of the Valley, and the Ornamental cherry tree. However, most plants, like hibiscus, prefer neutral to slightly acidic soil. The perfect soil acidity level for hibiscus is 6.6.
If you need to lower the pH of your soil, you can combine it with either sulfur or a sulfuric compound such as aluminum sulfate. If you need to raise the soil’s pH, you can use agricultural limestone or other liming materials like dolomite.
Fertility
When you start learning about fertilizer, the first thing you learn is the importance of the NPK numbers. You’ll see these three numbers on the packaging of any decent hibiscus fertilizer expressed as N-P-K. Here, every letter is changed to represent a number denoting concentration, and every letter stands for one of the 3 critical vitamins that plant life needs; Nitrogen, Phosphorus, and Potassium. Each of those plays a selected set of features to guide the increase and improvement of your plants.
Each kind of plant will have a specific NPK value due to the fact that most have varying needs in terms of concentrations of these three imperative nutrients. So you’ll have some fertilizers that have a value of, for instance, 5 -5 -5, which means that all three nutrients make up the right percentages. While equal nutrient ratios may also be appropriate for some plants, they’re a ways from perfect for hibiscus. This is due to the fact hibiscus is a long way greater reliant on potassium than any of the different nutrients, and giving it equal concentrations of the different vitamins may also do greater damage than good.
According to the majority of expert hibiscus cultivators, the best ratio of the NPK vitamins is three -1 -4. That is to say, a reasonable proportion of nitrogen, a low proportion of phosphorus, and an above-average proportion of potassium.
Bonus Content: Why is 7 neutral on the pH scale?
This isn’t actually as complex as it sounds. Basically, the man who created the pH scale, Soren Sorenson, couldn’t reasonably imagine that any plant would have more than 10^7 hydrogen ions or less than 10^-7 hydrogen ions. The distance between 7 and -7 is 14. However, to have a negative pH scale would possibly confuse people, so he used that 14 increment difference and added it to 0, determining 14 as the highest possible pH, and therefore, 7 as the midpoint. Technically, this was calculated at a temperature of 25 degrees. At 25 degrees, water has an equal concentration of hydrogen and hydronium ions, and therefore has a pH of 7; neutral. However, the pH scale is currently simply a matter of convention, and isn’t subject to change at different temperatures – at least in terms of the soil within which we root our plants. If it were, we’d all have to have different rules and conventions for temperatures differing more than a few degrees.
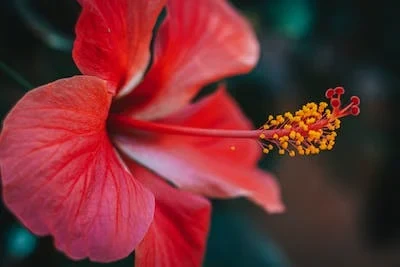
Reap the rewards
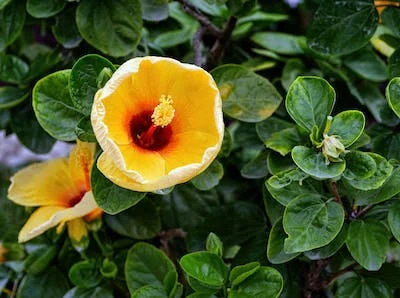
Hibiscus is absolutely one of the most visually rewarding plants you can surround yourself with if you take care of them. If you give them the right soil, nutrients, water, and light concentrations, they’ll be happy and give you some of the most varied and striking blooms on the planet. A little known theory is that flowering plants flower for us, as well as pollinators. The structure of our eyes and those of the pollinators are different. We see the world differently. Yet plants like hibiscus don’t just display color in the infrared range, they also display colors that only we can see with our specific set of photon receptors. Therefore, they bloom for us. Plants figured out along the way that humans tend to collect and effectively breed the prettiest flowers, therefore, being visually appealing to us is in the plant’s best interests. Over time, the cells that produce pigments that we can see have been selected for along with those visible to pollinators. Isn’t that just beautiful?


