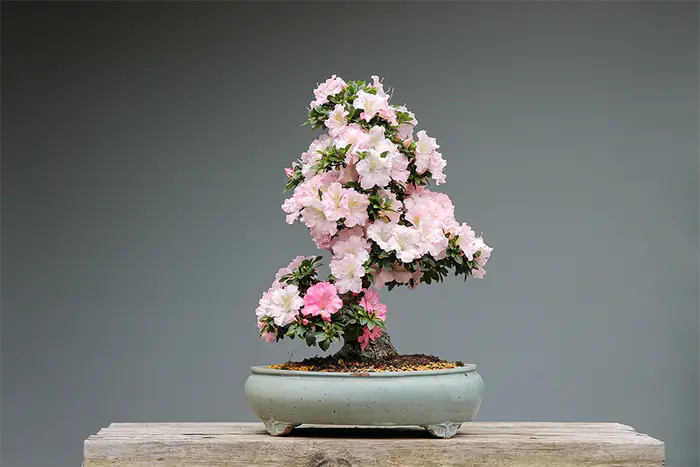
Growing new bonsai trees from Azalea cuttings can be an exciting experience. You can craft a clone of the one you have already, which you can give to someone as a gift, sell, or add to your collection. It also helps if you know someone with one of the brightly-colored species, and you’d like to take a cutting home.
In this guide, we’ll show you when to take Azalea cuttings, how to develop roots, and what steps you need to take to ensure it’s successful. We’ll also show you a few other propagation techniques you can try.
After you take the Azalea cutting, it’s time to get it ready to grow roots. The trees don’t enjoy resting in water, so the best method is to place them directly in the soil. Each species has a preference, while there are also different methods for evergreen and deciduous types.
During the growth cycle, you’ll need to check whether any roots are developing. Don’t remove the cutting completely from the soil, as the Azalea won’t enjoy it. Instead, gently tug it to see if there’s any resistance in the soil. If you feel it fighting back, you’re on your way to owning a new bonsai.
As a general rule, plants will usually develop the roots first before drawing up nutrients for the stem and foliage. So another way you’ll know you succeeded is if you see new buds and leaves appear. The more the upper structure forms, the more you’ll know there are healthy roots in the soil.
While we’ve shared some valuable knowledge above, we felt it wise to provide a step-by-step guide for taking your Azalea cuttings and developing them into bonsais. We’ll show you the methods for both types, so make sure you research which one your species falls into.
Growing Evergreen Azalea Cuttings
- When you see any new growth starting to harden in autumn, it’s time to take a cutting.
- Provide plenty of water the night before to ensure it remains soft on the inside.
- Wake up early in the morning and select a healthy branch with at least one whorl of leaves.
- Reduce the number of leaves by half.
- Dip the tip in root hormone powder that has indolebutyric acid as one of the main ingredients.
- Place the Azalea cutting in sterile soil that has 50% perlite/vermiculite and 50% sphagnum moss.
- Cover the pot and stem with a transparent bag, using struts or long kebab sticks to hold the bag high enough that it doesn’t touch the plant.
- Put the container in a location that has indirect sunlight, as too much direct light may damage it at this stage.
- Rotate the pot now and again for even light distribution, and you can use any bottom warming mechanism to encourage rooting.
- Wait about six months to see new growths on your cutting. When it’s strong enough, carefully repot it into a proper bonsai container with 40% perlite and 60% sphagnum moss.
Growing Deciduous Azaleas Cuttings
- For these types of Azaleas, take the cuttings in late spring or early summer when the wood is still soft and there’s new growth.
- You should aim for a length of at least 3 inches, but 5 inches is better.
- Follow the same rule for watering the night before and getting up early to take the cutting.
- Cut the stem just under a node, as it has a better chance of rooting that way.
- Use a rooting powder that contains fungicide to prevent the development of mold and other fungal diseases.
- Place it in soil that has 40% perlite and 60% sphagnum moss.
- When autumn arrives, you can use a bottom warmer to help the roots develop further.
- By the end of autumn, you should try to create a greenhouse effect to keep the Azalea warm and stop it from going into dormancy.
- Ensure there is indirect light and enough watering.
- When new growth appears in spring, you need to keep it in the shade. You can let it go into dormancy when the next fall arrives.
While using Azalea cuttings is certainly one of the top ways to propagate the tree, there are other methods you can try. They are incredibly challenging at times, but it may be worth the shot to see if you can master it.
Seeds
If you’re lucky enough to receive Azalea seeds in autumn, you’ll need to keep them stored in an envelope or sealed container until spring arrives. You can use 50% perlite and 50% sphagnum moss as the medium, but make sure you only spread the seeds across the surface. Don’t cover them completely.
You can use a transparent bag to let in light and increase the humidity. If you keep the temperature warm and the seeds lightly misted, you should see them germinate within 8 weeks. After you see the first real leaves, move them into their small bonsai pots. You’ll need to keep them warm during winter to prevent dormancy if they are deciduous.
Stem Layering
Another favored method is stem layering. How it works is that you’ll cut the bark off around a section of a long branch. You need to do this as spring arrives when new growth is expected. You can decide if you want to use the ground or soil in a separate pot for the next phase.
Pour some rooting hormone as required around the open wound. Once done, place the section in the soil and use pins to hold the limb in place, you can also cover it with a rock. Keep watering it to ensure that it has enough moisture. After 12 weeks, you can gently remove it from the soil to see if there are roots, cutting it by the stem under the new growth.
Air Layering
If you have a larger Azalea or you can’t bend the branches to the soil, you can try air layering instead. It follows a similar process as stem layering, except that you’ll strip a length of bark where you want the roots to form. You’ll also use peat moss instead of the soil mixture around the opening after you’ve applied your hormone powder.
To keep everything in place, you can wrap a foil packet around the branch and peat moss. Tie it at both ends to secure it, but make sure it’s not too heavy. You can use a second foil to help if you need it. Once everything is in place, you’ll need to keep watering around the ends to ensure it seeps in, but you can also use a syringe.
You should see roots after about 12 months. Wait until they are lengthy and strong before removing the Azalea cutting from the parent tree. You can place the foil back until that time.
Grafting
A more complicated way of growing cuttings is grafting a scion onto a rootstock. You can remove any leaves from the upper structure of the trunk and cut it just above the roots. With cotton string, you can tie the lower end of the cutting to the upper end of the stock.
Leave this in place for a few months, and remove any shoots that develop from the rootstock, as it should only form on the scion.
As you can see, developing a new Azalea bonsai from cuttings is an incredible experience, and we encourage you to try it. It will take time and patience, but you should be used to it by now if you have several trees in your collection. Let us know if you have managed to grow your own one and what your experience was.