
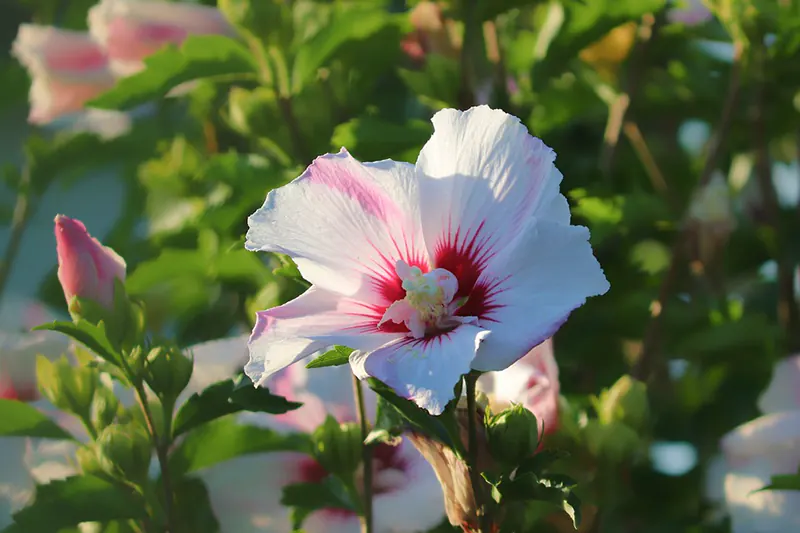
HIbiscus requires a good deal of moisture to thrive because of how substantial the plant is and how big its flowers get. This is no small shrub. With blooms as big as dinner plates, in some cases, you’re looking at a plant with a high nutrient, light, and water requirement. However, hibiscus is primarily intended for the warm and humid climates of the earth’s tropics.
While the tropics experience a good deal of rainfall throughout the year, this doesn’t mean you should drown your hibiscus plants. That said, what happens if you have an overly wet season or you accidentally give your hibiscus too much water?
Below, we’ll give a quick guide on how to revive an overwatered hibiscus in 5 simple steps.
Steps for Reviving an Overwatered Hibiscus
Step 1: Empty the Drip Tray
This is supposing your hibiscus plant or bonsai is in a pot. You need to lift the pot carefully out of its drip tray and then empty out the water that has collected there. There’s no need to waste this water, though; I usually empty drip trays into another container which I can then use afterward to water any plants that need it. (I have a lemon tree in my front yard that produces the sweetest hybrid oranges when I give it loads of water).
Another thing you’ll want to do is check the drainage holes under the pot your hibiscus is in. Sometimes the issue is that your plant has become waterlogged due to a blockage in the drainage hole. This results in the pot being unable to release excess water into the ground or drip tray, and thus your plant starts drowning.
You always want to ensure that your drainage holes are clear and able to operate properly. A good tip to achieve this is to use any medium larger than the holes themselves in the very bottom of your pot. This way, the medium won’t get stuck or compacted into the drainage hole and your plant will be able to get rid of excess water.
Step 2: What’s the Extent of the Damage?
This next step basically determines your next move. You need to assess the plant in order to decide how best to proceed and if there is any hope of saving your hibiscus. The best way to do this is to lift your plant out of the pot. Depending on how big your hibiscus and its pot are, this may require a good deal of digging.
Your goal here is to determine whether root rot has been allowed to set in. If your hibiscus’ roots still look intact and don’t give off any foul odors, they should be healthy. If there is a pungent smell when you expose the roots of your hibiscus plant, they are most likely in the beginning stages of decay.
Step 3: Move your Hibiscus
Here is where your treatment plan changes depending on the damage to your hibiscus’ root system. If there is no evidence that root rot has set in, you should be able to simply move the entire pot to a warmer location. I understand that this is a season-dependant move, but try to the best of your ability to get your hibiscus warm and a little drier. If you have to rescue an overwatered hibiscus in the winter, you may have to move your plant between the inside and outside, depending on the nightly and daily temperatures.
Remember that hardy hibiscus is the best type to grow in colder climates as it handles colder temperatures far better than the tropical variety can. Soil has been proven to dry far slower in cool, stagnant conditions. You’ll want your hibiscus’ soil to dry out fairly quickly. This is why we prescribe getting your plant into a warm and dry place.
Step 4: Repot your Hibiscus
This is the next logical step if you’ve identified evidence that your hibiscus’ root system has started down the path of decay. If your roots have started rotting, it won’t do you any good to put your hibiscus in the sun and hope for the best. You need to be more proactive and involved. The moment you smell the dreaded sickly sweet scent of rotting biological material, the beetle between life and death begins.
First, you need to remove your hibiscus from its pot entirely. You won’t use that pot again for this hibiscus; you’ll need to find a clean, dry one. Next, you need to remove as much of the damp, sodden soil as you can. Any damp soil will just support the process of decay that has already started within your hibiscus, so you need to purge the root system of it.
Now, you need to get out your trusty shears and trim off the rotting bits of root. You need to try and get as much of the rotting material off of the root system as possible. Decay spreads like wildfire, and your goal here is to prolong decay long enough for your plant to begin repairing itself. Your shears need to be clean for this process. It’s entirely pointless spreading decaying tissue and the enzymes responsible for the decay of biological matter to your other plants.
Once you have cleared the root ball of as much rotting material as possible, you should be free and clear to plant your hibiscus in a clean, dry pot. Remember not to make the soil in the new pot too damp; your plant needs time to repair its root system before it can be on the receiving end of any deep waterings again.
Step 5: Prune your Hibiscus
Next, you need to examine the rest of the plant for signs of decay and rot. You’re looking for limp branches, yellow leaves, wilted flowers, or anything of the like. There may also be a foul smell present in any of the rotting materials mentioned above. Take your shears once again and make your way around the foliage on your hibiscus, removing anything that isn’t green, thriving, supple, and fresh.
It’s important to get rid of as much rotting biological material as possible because of the enzymes we mention in the previous step. These enzymes have one objective; to break down biological matter. And they will initiate the processes involved with biological decay wherever in your garden they may land. Clean your shears afterward so that you don’t spread any enzymes or rotting matter to any of your other plants.
Step 6: Monitor your Hibiscus
From personal experience, the last step centers around you waiting with bated breath for your plant to start thriving again. You’ll need to keep a close eye on your plant for a while. Keep an eye out for when the soil is dry again. Once the soil your hibiscus is planted is once again dry, you can start introducing small amounts of water into its ecosystem. You don’t want to give it too much water lest the root rot starts again.
A good tip here is to water very slowly, barely a trickle. Also, only water until you see water dripping from the bottom of the pot; this means the pot has received enough water, and any more will be excess.
For future reference, most hibiscus plants enter a stage of dormancy during the colder winter months. During this time, they need considerably less water than in the warmer months and active growing phases, but it’s still never a good idea to let the soil dry out completely in winter.
Gently Does it
As hardy as your hibiscus might be, no plant requires rapid waterings that lead to waterlogged pots and rotting roots. In general, you should water your plants slowly so that you don’t drown them accidentally. You also need to ensure that any pot you plant your hibiscus in has drainage holes and that these aren’t blocked or clogged as you fill your pot. HIbiscus care isn’t all that difficult, and at least you can count on us to help you out if you happen to stumble a little on your way.


