While you may not like parts of your small tree dying, there’s a beautiful style called deadwood bonsai. In some forms, did does kill a part of the tree, but it keeps many primary elements alive. It can be tricky to perform, and only experts should do this at home.
In this quick guide, we’ll explain what deadwood bonsai is and isn’t, the types of styles you can develop, and how to make one with your miniature tree. We’ll also explain how to treat the wood to prevent it from killing the entire tree.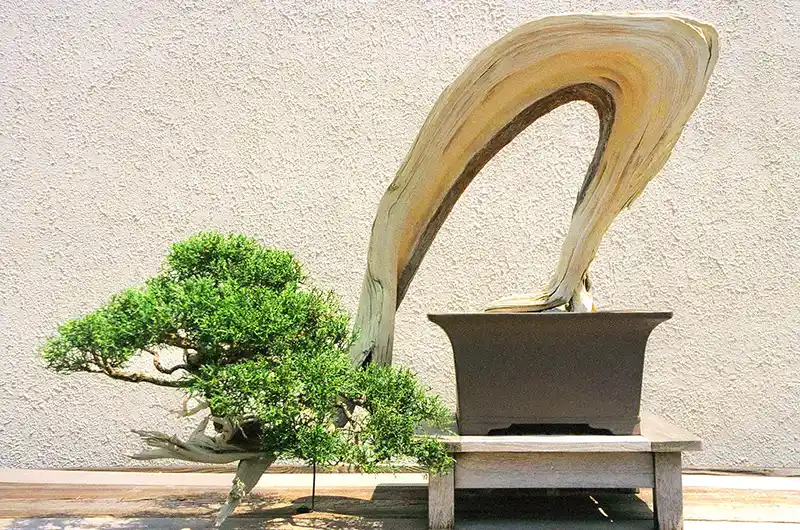
Image courtesy of Grufnik | License Details
There isn’t just one form of deadwood bonsai. The type you’ll use depends on the application. The first four relate to the actual tree you’re growing, while the last one deals with attaching deadwood to a living plant. Let’s take a look at the variations so you can decide which is best for your situation.
Jin
Have you ever seen a tree where the top part is burnt or broken with only leaves on the lower part of the tree? Sometimes, strong winds also destroy the upper parts, making the tree look very old. When you replicate this art in a bonsai, it’s called Jin.
In the style of deadwood bonsai, you’ll scrape the bark off the top leaders, exposing the wood and forcing it to stop growing in that area. A benefit is that the lower branches will become stronger, and you’ll see new shoots appear lower down.
Uro
The Jin style works incredibly well on conifer trees, such as the Juniper, Italian Cypress, and Spruce. However, when you try it on a deciduous tree, the other branches tend to die and fall off. The deadwood bonsai art form you should try instead is Uro.
Uro is where you make use of a wound after removing a branch. You cut a small hole around where the branch attached to the trunk, leaving a hollow section. The bonsai will grow new wood and shoots around this deadwood area, which adds to the appearance of age.
Shari
Another feature you may find on trees in the wild is a large opening or wound in the trunk. It’s usually caused by strong winds that bend and rip open the trunk, or it can be lightning that hit it. Either way, you’re left with a massive gaping opening with new shoots and life around it.
When it comes to deadwood bonsai, we call this style Shari. You can create the wound yourself with a knife or a similar tool, creating a dead portion that the rest of the tree grows around. If you make the wound large enough with surrounding dead bark, it’s called driftwood or sharamiki.
Sabamiki
You can also open the wood enough that you can see the inside of the trunk or branch. It needs to be done in a way that nutrients can still travel to the upper parts of the deadwood bonsai so that leaves and branches still thrive. This style is called Sabamiki.
What is Tanuki bonsai?
If you find a stunning driftwood piece in the wild, don’t discard it. You can use it to make a Tanuki deadwood bonsai. What you do is create openings or sections in the driftwood where you can place a small living tree inside or through it. It creates a contrast between the living and the dead.
The benefit of this style is that you won’t cause any harm to the living bonsai. You can work on the driftwood as much as you want, as there isn’t any life left in it. Another term for it is Phoenix Grafts, and many bonsai enthusiasts employ this style.
Image courtesy of Mike | License Details
Now that you have a better idea of what a deadwood bonsai is, let’s see how you can make one at home. Remember, it takes an expert to get it right without killing the tree, so be careful if you’re still a beginner.
Step 1: Decide on the deadwood style for your bonsai
Firstly, make sure you know which style you want before you begin. You shouldn’t head into this blindly, as you’ll cause unnecessary damage. Some people aim for more than one deadwood style on their bonsai, which also requires planning and preparation.
You’ll also need to choose where on your bonsai would be the best place to make the deadwood section. If you only have one leader or trunk tip, you don’t really have much choice when it comes to jinning. Of course, the same doesn’t apply with more than one leader or when dealing with a bonsai forest.
Step 2: Prepare your tools
Next, it’s time to prepare the tools. You can’t use a standard kitchen knife to make the cuttings, as it will damage the surrounding wood. You can buy specific tools for the job, such as Jin pliers. There are also pouches with bonsai toolsets that contain items like knob pliers, splitters, cutters, and more.
Step 3: Carefully cut the area
Now that you have everything ready, you can clear the bark or make the wound in the designated area. Don’t cut too deeply or remove the vital parts that carry the nutrients. You’ll want them as healthy as possible to promote growth around it.
If you’re aiming for Tanuki, you can drill holes in the driftwood through which you’ll pass the branches of the live tree. Make them nice and big so the leaves don’t break, and make sure they remain clean. You don’t want the holes to become home to small insects and mold.
Step 4: Clean away any rotten or crumbling wood
If you’re already dealing with some deadwood on your bonsai, it may be that the wood is fragile in that area. While you’re working on the wound or bark, have a look at how healthy the surrounding part is. Don’t let any rotten or crumbling parts remain, as it may cause issues with the health of the tree. You can also sand the wood to make it smooth.
Step 5: Treat or harden the wound
You’re almost at the finish line. Remember the wood hardeners we mentioned earlier? You can now take that and apply it to the deadwood section. Make sure the bonsai absorbs as much of it as possible, and you may need to reapply some in a few weeks time if you see it drying out.
For any hole you’ve drilled, you can also apply a sealant. It effectively closes the hole so that nothing can infect it, and it also keeps out insects and diseases. Try to find a sealant that’s a similar color to the applied area so it looks natural.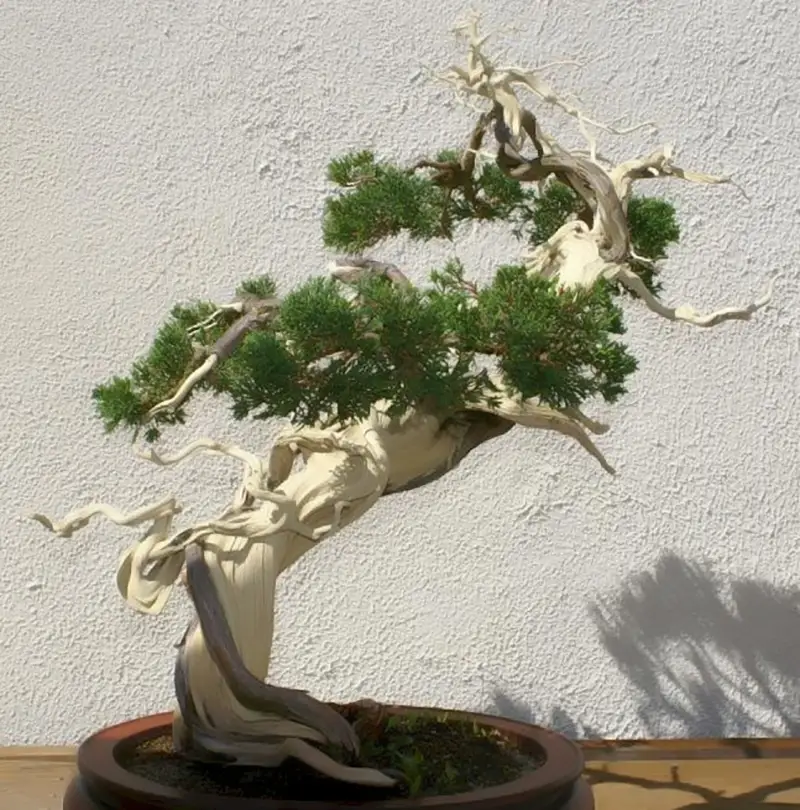
Image courtesy of David J. Stang | License Details