If there’s anything that attracts people to this stunning ancient Japanese art, it’s the cascading bonsai. The way the form flows over the container’s edge, the manner in which it teases the air and calls to your soul, it’s one of the most beautiful styles when done right.
In this guide, we do more than simply show you how to cascade bonsai. We introduce you to the different forms and techniques while also examining the various zones you should pay close attention to. We don’t want you leaving here without knowing how to become a master of this style.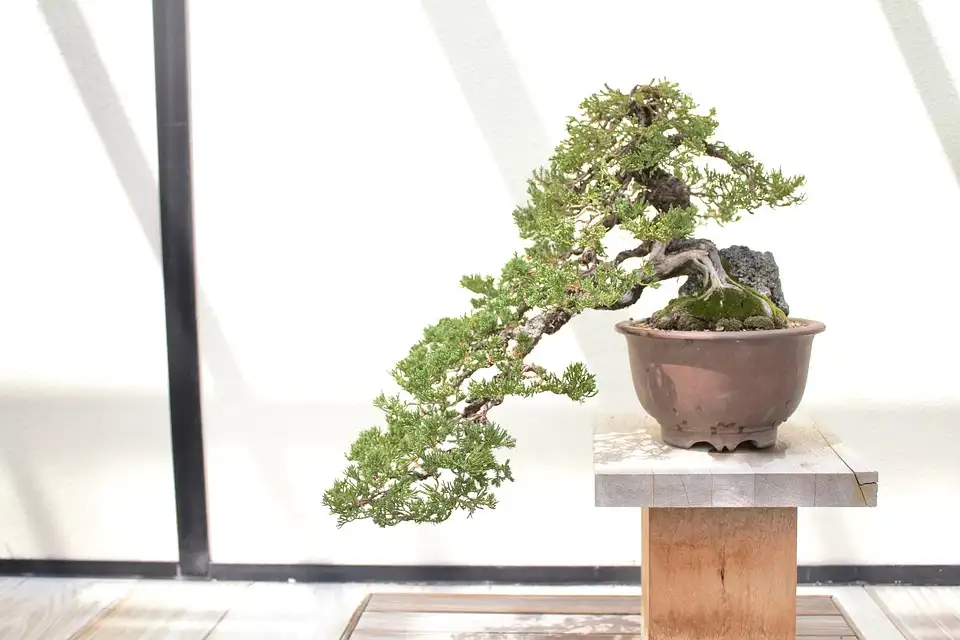
The best time of the year to train your bonsai for cascading is when you see new growth appear of if there’s semi-hardwood or softwood you can easily bend. If the wood is completely hard on the inside, you’ll risk breaking the stem. Sometimes it helps to overwater the tree the night before to make it more pliable.
Some species do well with bending in winter when the bonsai is dormant. It also depends on how old the tree is when you start, as younger ones are easier to train. You’ll want the best chance of success, but it will take you years before you see a decent result.
Now that you have a slightly better idea of what it is and how it works, here are the steps to developing your cascade bonsai. Later on, we’ll show you some variances on this method as well as provide helpful tips. So, keep reading.
Step 1: Visualize your design
Before you begin, present your mind with an idea of how you’d like the bonsai to look when it’s cascading. You can gently play with the wood to see if it will bend to the shape you desire, testing the flexibility of the stem. It’s good practice to ensure that there’s no breakage from the pressure.
You can also sketch the design on paper if it will help you with your planning. Feel free to place cut lines where you intend to remove twigs and branches. You’ll regret simply getting started with the next step without some idea of what you’re aiming for in the end.
Step 2: Remove unwanted branches
With a better idea of where you’re heading with your cascade bonsai, you can now start removing the branches that won’t play a role in the final design. Most people eliminate the ones that are facing downwards or towards the container. It creates more space and the appearance is more appealing.
You should also create tiers or levels along the upper part of the trunk. Try to make more space between nodes, clearing unnecessary leaves and shoots. Over the years, you’ll need to keep watch that new stems don’t appear where you don’t want them.
Step 3: Anchor and wire
Now you’ll need to make 100% sure your bonsai is in place before you cascade it. When you bend the trunk, the pressure may cause the roots to pull out of the soil. You should anchor it into place first before you start wiring the main trunk.
To do so, tie thick wire through the drainage holes and then up around the trunk’s base. Try to make a loose knot, as the trunk will swell as the years go by. There’s a chance the wire will bite into the wood and cause damage. With the anchor in place, you can place the soil in the container.
Step 4: Carefully bend the trunk
Here’s the part that scares most beginners. That’s why we said you should practice first. Bend the trunk with the new anchor in place towards the shape you want it to be. Check what you’ve eliminated the branches you don’t want and everything is secure.
If it snaps, don’t stress. The tree will happily grow back if looked after carefully. For a higher chance of success, overwater your bonsai a day or two before so that the trunk becomes more flexible. Should it bend quite well, your bonsai is ready for cascading.
Step 5: Wire your cascade bonsai
Before you start wiring the cascading bonsai into place, you should place some raffia around the trunk so you don’t scratch or injure the wood. Next, start at the base to provide an anchor point, carefully winding the wire all the way to the upper tip. You need to make sure you don’t hurt any of the branches along the way.
The wire should be a small gauge that’s strong enough to keep the trunk in place without causing too much pressure or damage. Usually, a third of the stem’s width will suffice, but you’ll need to test it with the bonsai you’re busy cascading.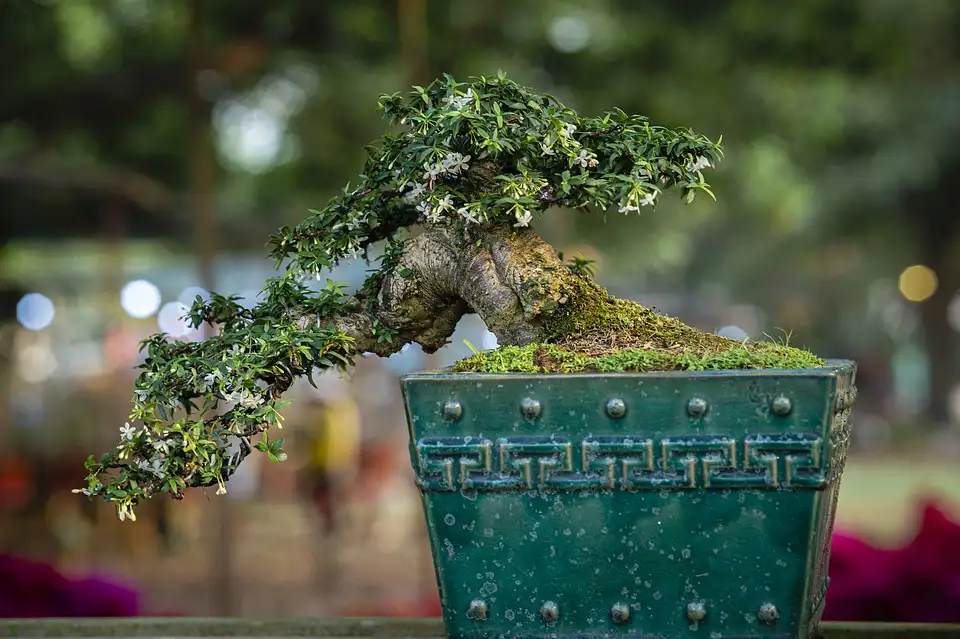
While we mentioned one specific form of bending in our steps to developing your cascade guide, there are other methods available. Wiring is by far the most popular, but this wouldn’t be a complete article if we didn’t discuss all of them and their benefits.
Wiring
As mentioned, wiring is one of the easiest and most popular ways to cascade a bonsai. You can bend the trunk any way you wish and create some brilliant designs. There’s also the chance to tie the tip to the shelf at the base to help it bend down.
Of course, there are some distinct disadvantages. For one, it doesn’t look natural to have all these wires on the bonsai. Also, the wood will swell over time and you need to ensure the wire doesn’t bite into the bark. It can cause damage and infection to your precious tree.
Weights and Clamps
There are specialized clamps for bonsais called branch benders. You only need to place it at the main spot of bending for the cascade for form. You can place more than one if you need to, but in most cases, there isn’t really a need. After about two seasons, you should be able to remove it with the trunk remaining in place.
Some people also use weights that gently pull the tip or the midsection of the trunk down. If you use one that’s too heavy, there’s the chance the wood will snap or break. You’ll need to experiment with them to see if they work for you. Also, these bonsai weights aren’t as readily available as wire.
Natural Growth
Finally, there’s a more natural way of creating your cascade bonsai that will eliminate most of the steps we mentioned above. You won’t need any special equipment, and you can basically get away with just the pot, soil, and tree. However, you’ll still need to anchor it to the container to make sure it doesn’t fall out.
What you’ll need to do is place the pot on its side instead of flat on a surface. The soil is tightly packed so that it won’t fall out. When it’s time to water it, you can quickly place it down, let the liquid drain through, and then turn it on its side again. The tree will want to grow up and away from gravity, which means it will develop over the pot’s side.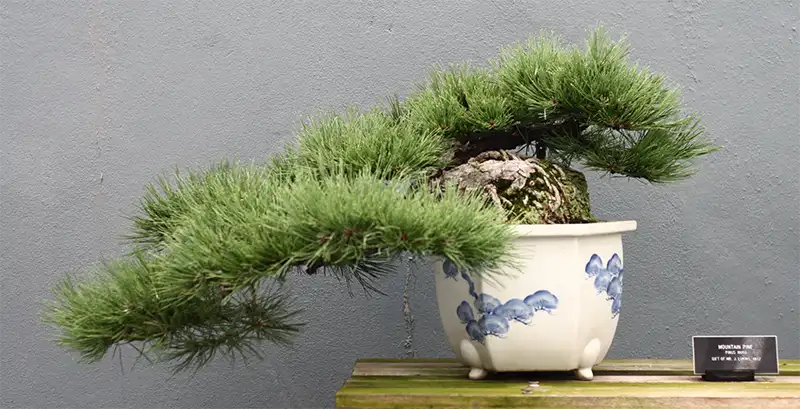
Image courtesy of Ragesoss | License Details
There are plenty of species you can use for a cascade bonsai that aren’t on the list below. However, you’ll notice that these are mostly evergreen conifers. The main reason is that they are perfect for bending with their semi-hardwood and softwood. Still, nothing stops you from trying trees from the angiosperm families.
Here’s our list of species you can try when creating a bonsai that cascades.
Chinese Juniper
The Chinese Juniper is probably the species you see the most as a cascading bonsai. It has luscious green needles and reacts well to bending. It also does well indoors, which is where you’ll need to place it while you’re training it. Try to aim for late winter or early spring when you’re ready to give it a try.
Green Mound Juniper
Also known as the Garden Juniper, you may recognize this popular tree from the Karate Kid moves back in the day. Strangely, it’s almost seen as a weed in the native Japanese country where it grows so easily. Yet, many people would die to get their hands on this fantastic bonsai, and it does perfectly well in cascade form.
Needle Juniper
Known to many as the temple juniper, what’s more sacred to have in your home as a cascading bonsai? While it’s native to China and Japan, the United States has also naturalized it. It has a close relation to the common Juniper, which is also good for crafting a cascade style. However, we like the formation of the needles on this species more.
Japanese Black Pine
You may have seen the Japanese Black Pine in tall, thin pots, either in bonsai museums or in ancient drawings. The needles look outstanding on cascading trunks, and the trunk is strong yet flexible. The candles may be difficult to manage at first, but you’ll get the hang of it after a season or two. Try to get a tree that’s already well-established, as the stress of bending it may cause it to suffer.
Japanese White Pine
You may know this tree as the five-needle pine, depending on your source. The leaves provide a wonderful white sheen in the summer, which looks outstanding as a cascade bonsai. If you’re lucky enough to see yours flower, it will put on a brilliant display in your bonsai area. Make sure the sunlight makes it shimmer!
Mountain Pine
With slightly thicker needles, you may not expect the Mountain or Bog Pine to perform well as a cascading bonsai. The trunk and branches are incredibly flexible, and you can train the leaves to grow smaller. You’ll be surprised how beautiful they look overhanging the side of the container.
Scots Pine
We’ve tried many times to grow the Scots Pine from seed, even with special fungal powder, but it seems this species is out to beat us. Still, this evergreen conifer is one of the preferred pines to cascade in several countries due to its availabiltiy.
Pomegranate
We wanted to put at least one deciduous tree on our list that wasn’t a conifer. It may seem strange that we selected the pomegranate bonsai, but there’s a good reason. Do you know how huge the fruit usually becomes? Well, it’s ideal as a natural weight to hang a branch over the side without using any other equipment.
Image courtesy of Jerry Norbury | License Details